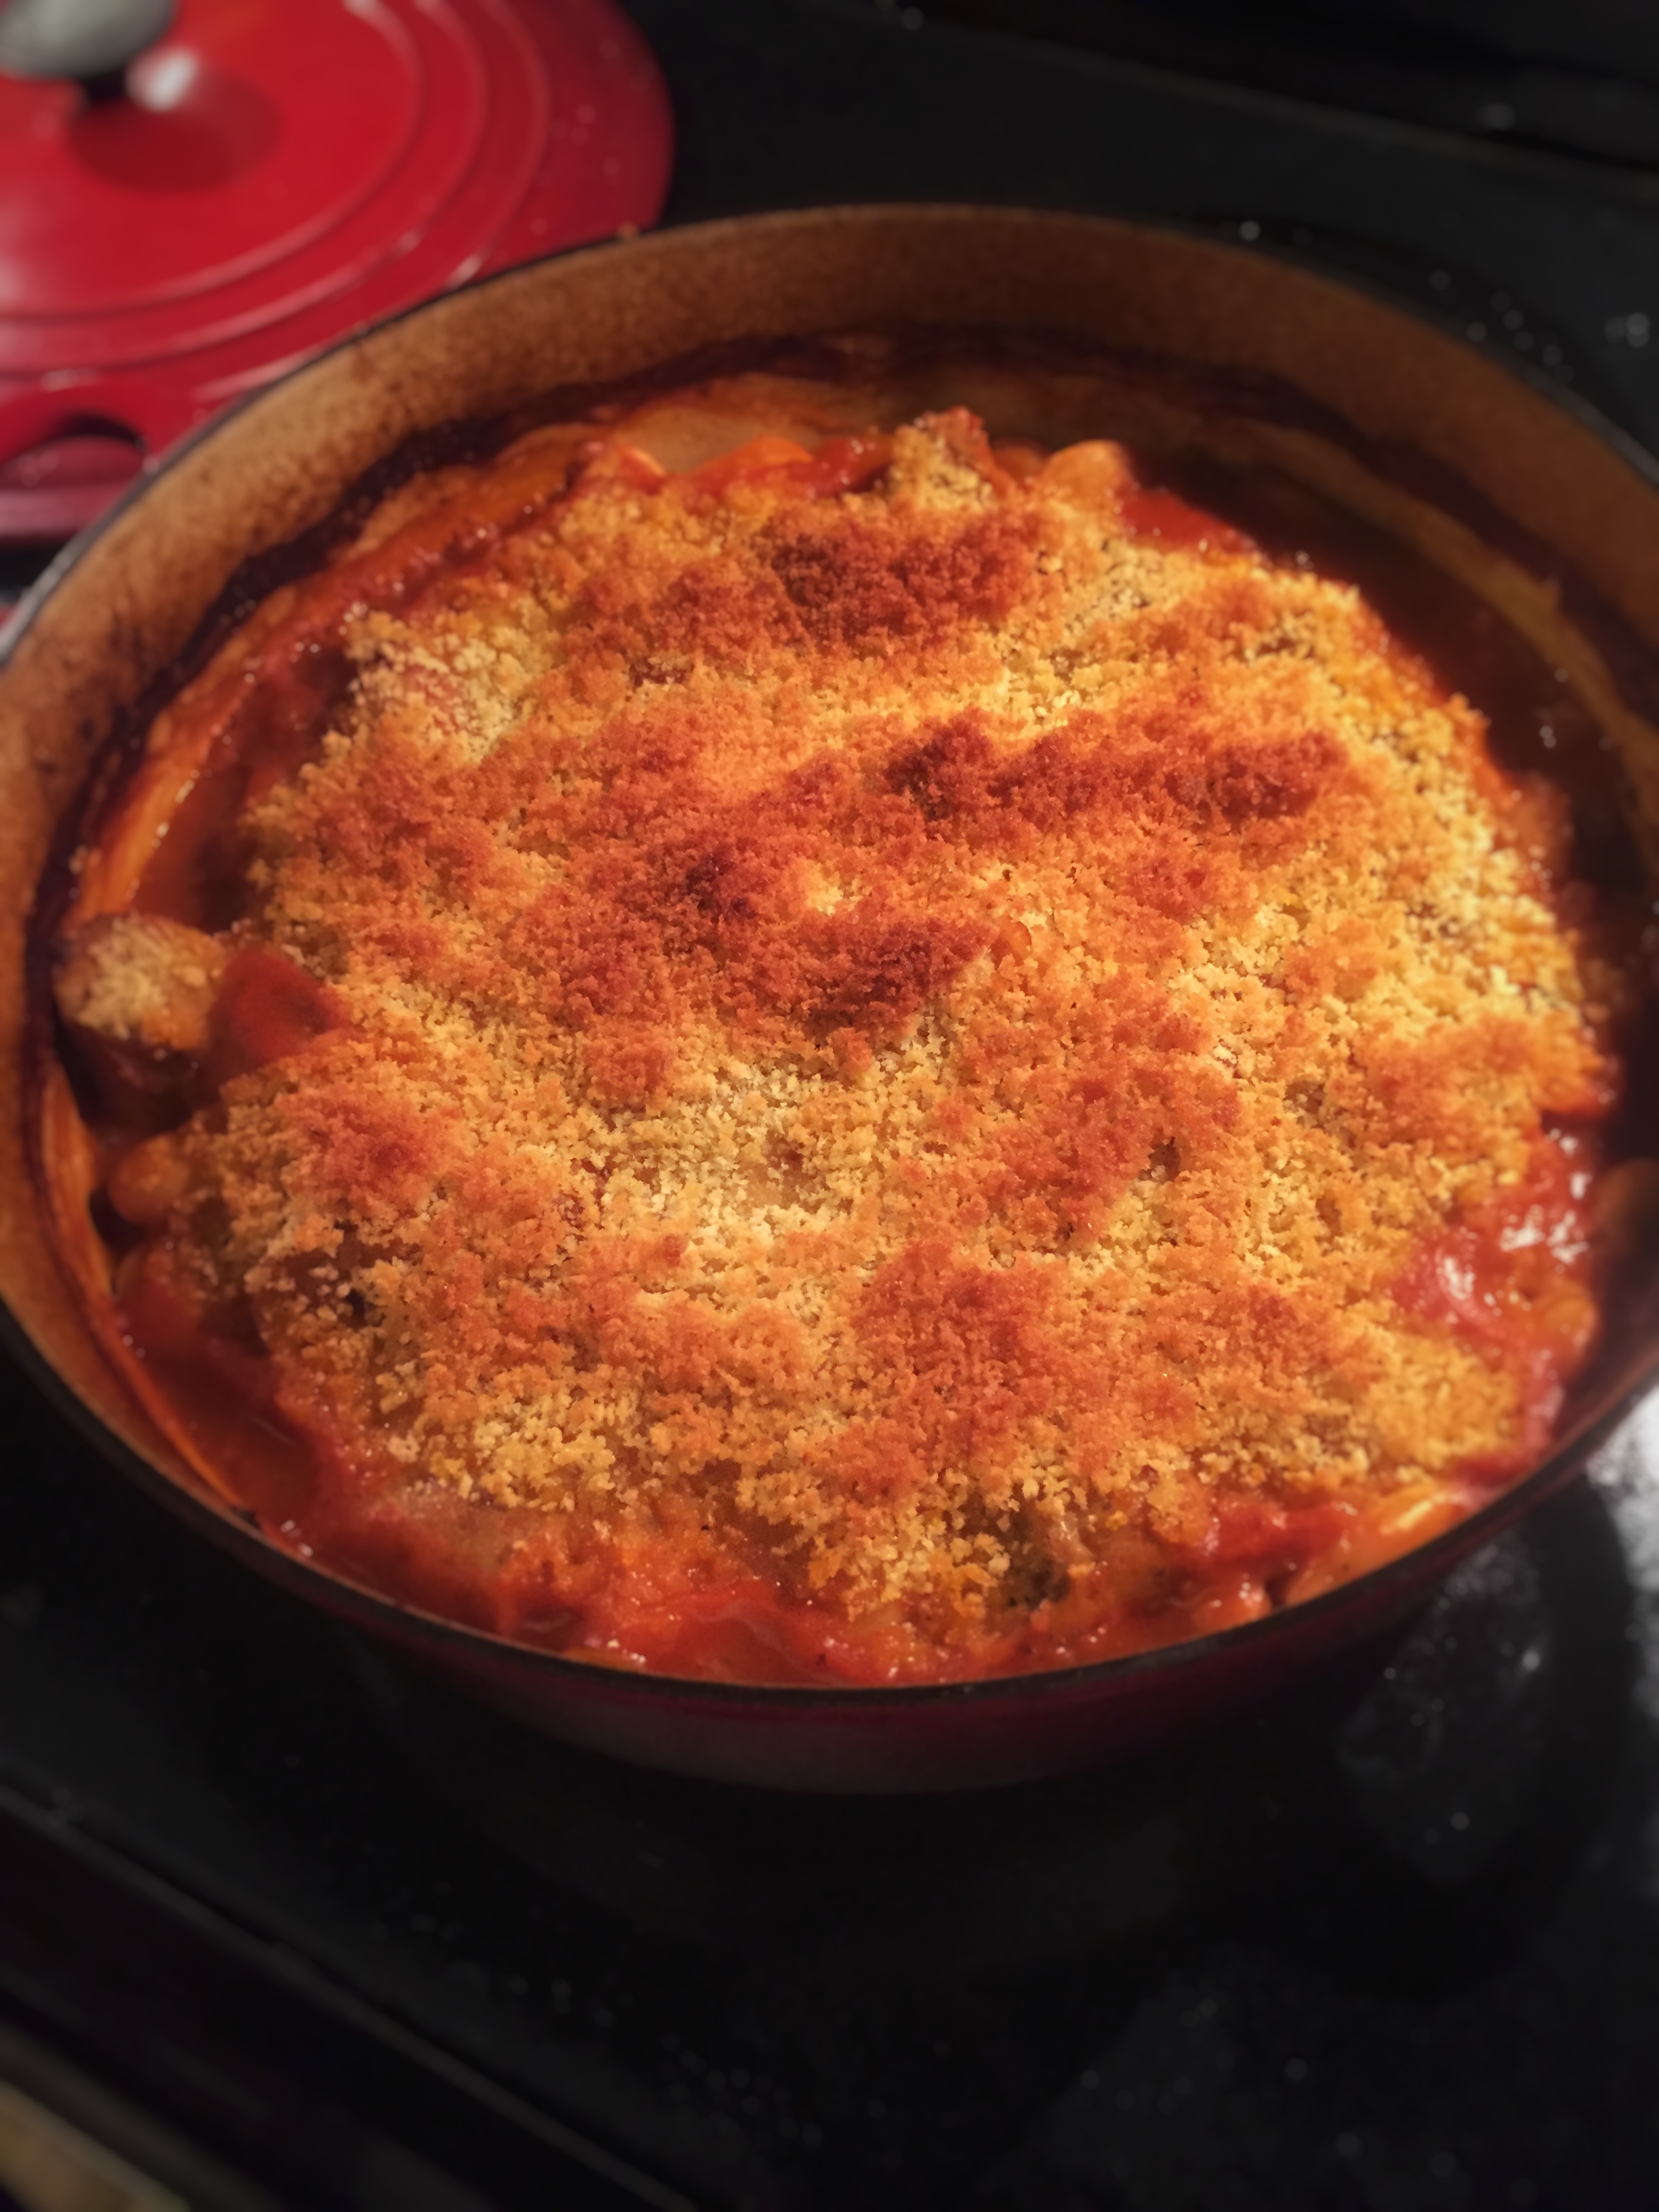
Corona Bean and Sausage Cassoulet

IMG_1135.JPG


I first encountered Rancho Gordo beans a few years ago during a visit to San Francisco.  I was meandering through the Ferry Building when I came upon their shop.  There was a giant tub of dried beans inviting passersby to run their hands through them, so I obliged. I began to peruse the shelves and couldn't help taking home a bag of big, beautiful royal corona beans. This corona bean and sausage cassoulet was the first recipe I made with them and it's one I come back to every year as soon as the weather is cool enough to run the oven for a few hours. I love to make it on a Sunday for dinner and have leftovers for lunch the rest of the week. I hope it will become one of your favorites.  Don't be surprised if it makes you an heirloom bean convert too.

A note on bean soaking - there are many different schools of thought here.  I use one of two methods.  If I remember ahead of time, I'll dump the dried beans into a bowl, cover with water by a couple of inches, and soak in the fridge for several hours or overnight.  If I don't remember to soak, I'll use the "power soak". To power soak, place the dried beans in a large pot and cover with water by a couple of inches. Bring the beans to a boil and boil for 5 minutes.  Then remove from the heat and let stand, covered, for one hour. Some people will swear allegiance to one method or another. I say do what works best for you.

Corona Bean and Sausage Cassoulet (Adapted from Bon Appetit)

3 cups dried corona beans (or other large bean), soaked and drained

4 tbsp olive oil

6 spicy Italian sausage links (I like the chicken variety from Whole Foods)

1 large leek, sliced in to 1/4 in rounds

1 small onion, finely chopped

5 cloves garlic, thinly sliced

2 tbsp tomato paste

2 tsp smoked paprika

3 cups chicken broth

1 28oz can whole tomatoes, preferably fire roasted

7 sprigs thyme

2 bay leaves

2 sprigs rosemary

2 cups panko bread crumbs

salt and pepper to taste


Place beans in a large pot and add water to cover by a few inches. Simmer the beans, partially covered, until they are just beginning to be tender, 1 1/2-2 hours. Set aside 1 cup of bean broth from the pot then drain. 

Preheat oven to 450°. Heat 2 tbsp oil in the same pot used for the beans over medium. Sear the sausages until they are browned on all sides. They do not need to be cooked through but you want to get plenty of color on the outside. Remove sausages to a plate and set aside.

Add leek and onion to the same pot. Season with salt and pepper and cook until the vegetables are softened and beginning to brown. Add the garlic, tomato paste and paprika and stir to combine.  Continue stirring until the tomato paste begins to caramelize, about 2 minutes. Add the bean broth, chicken broth, beans, tomatoes, thyme, bay leaves, and rosemary and bring to a boil.

Cover and bake for 30 minutes. (At this point the beans should be very tender. If your beans are not tender, continue baking until they are) Slice each sausage into 3-4 pieces and add to pot, pressing to submerge. Bake for an additional 40 minutes.

Place panko breadcrumbs in a small bowl, drizzle with remaining 2 tbsp olive oil, season with salt and pepper, and toss to combine. Remove herb sprigs and bay leaves from the cassoulet. Sprinkle panko in an even layer over the cassoulet and bake, uncovered, for 15 minutes. Let stand for 15 minutes before serving. 


IMG_1136.JPG


Chimichurri

IMG_1027.JPG

I've been thinking a lot about vegetables lately and how challenging it is to eat enough of them despite being a big fan. Some people solve this problem by only eating salad or pretending zucchini is pasta but that's never really been my style.  Instead I'm taking a page from some of my favorite restaurants and focusing on giving vegetables the star treatment so that you can actually get excited about eating them.  One of the easiest methods I've found so far involves a little green sauce called chimichurri.

While chimichurri is a staple in Argentinean cooking, I managed to spend 30 years in America without tasting it. Don't make the same mistake. This miracle of a condiment has everything going for it - a punch of herbs, a little bit of heat, richness from the olive oil, and enough vinegar and salt to keep it all in balance. It turns just about any grilled or roasted vegetable from a respectable but dull side dish into one you can't stop eating. 

Here's how you take it from sauce to dinner:

1. Make the chimichurri (recipe below).  The flavor gets better if it has 20-30 minutes to hang out.

2. Toss veggies on a sheet pan with olive oil, salt, and pepper and throw them in the oven to roast.  My rotation includes carrots, parsnips, sweet potato, asparagus, cauliflower, and runner beans. Don't sleep on the sweet potatoes.

3. Grill up a flank steak or any other protein lurking in the freezer. A grill pan is a great option if you can't get to an actual grill.

4. Pile your meat and veggies onto a platter and serve with a bowl of chimichurri. I like to do a drizzle over everything while my boyfriend prefers to make a puddle in the center of the plate for dipping.  Find the method that brings you joy.

5. If you had the forethought to make extras, you'll be enjoying some very tasty work lunches. Leftover chimichurri keeps in the fridge for about a week.


Chimichurri (Adapted from Food & Wine)

1/4 cup finely chopped parsley

3 tbsp red wine vinegar (equal parts sherry vinegar and white vinegar also works)

4 large garlic cloves, minced

2 tbsp oregano leaves, finely chopped

2 tsp crushed red pepper flakes

salt and pepper to taste

1/4 cup extra-virgin olive oil

Combine parsley, vinegar, garlic, oregano, and crushed red pepper in a small bowl. Season with salt and pepper to taste.  Drizzle in olive oil and stir to combine.  Let sit for 20-30 minutes and taste again before serving and adjust seasoning if needed.

Note: I've reduced the amount of olive oil in the original recipe by half because I like the herbs and vinegar to come through more.  The volume of olive oil can be adjusted to your personal taste.

Popovers

IMG_0985.JPG

When you're an early bird living with a night owl in a loft apartment without many walls or doors, you spend a lot of early morning hours creeping around like a cartoon burglar.  I've become really good at getting dressed in the dark and watching tv at a barely audible volume but cooking quietly remains a challenge.  I love it when I find a recipe that allows me to spend some early morning quiet time in the kitchen without waking sleeping beauty and popovers are just the thing.

Popovers seem to be a forgotten baked good but I'm ready to champion their comeback. They require only a few basic ingredients, are endlessly customizable, and are downright fun to make. I like them plain for breakfast, smeared with salty butter and jam, for brunch alongside soft scrambled eggs, or at dinner,  dunked into a soup or stew.  If you want to take them in a savory direction, black pepper and parmesan or a handful of whatever herbs you've got laying around are delicious additions.

The thing that makes popovers fun is the "pop" or rise they get in the oven.  For me, the thrill of seeing an inch or two of batter transformed into a towering popover has yet to get old.  As long as you stick to a couple of basic rules, getting your popover to pop is easy.  First, make sure your milk and eggs are at room temperature.  If you're short on time, microwave the milk for a few seconds and run the eggs under warm water to warm them up.  Second, don't open the oven while the popovers are baking.  Easy breezy.

There are many popover recipes out there in the world and with lots of variation in cook time and ingredients.  I use Alton Brown's recipe.  It comes out perfectly every time (as long as you follow the rules above) and it makes a great blank canvas for adding your own flavors.  He recommends using a blender to mix the ingredients but I just dump everything into a glass measuring cup and give it a quick whisk. 

If you're looking for a popover pan, I use this baby.

Happy baking!


Romano Beans

I really love the idea of waking up on a sunny weekend morning and taking a leisurely stroll through the local farmers market.  In this fantasy, the farmers market becomes a relaxing ritual that inspires a weekend of great dishes.  In reality, I get a weird sunburn while waiting in an absurdly long line for berries and then spend 45 minutes on a crowded bus trying not to smash my expensive produce. Nevertheless, I've been making an effort to go more often and was recently rewarded with the discovery of romano beans.

I decided on a simple preparation for my first attempt - blanched for a few minutes and then tossed in a shallot vinaigrette.  We ate them as part of a Sunday feast with friends that included grilled sausages, a radicchio salad, and grilled garlic bread, but the beans stole the show. They taste mostly like a green bean but have a fantastically meaty texture that makes you want to go back for more.  The mild flavor also means you can take them in almost any direction you please.

This past Saturday I hit the market again for another fix.  On Sunday I served them alongside Smitten Kitchen's Corn Chowder Salad, this time tossed in a little melted butter and whole grain mustard. Once again, we cleaned the bowl.